> ## Documentation Index
> Fetch the complete documentation index at: https://developers.techwolf.ai/llms.txt
> Use this file to discover all available pages before exploring further.
# Installation
## Prerequisites
To ensure a successful installation, the following checklist outlines the
necessary prerequisites:
* You have administrative access to the Jira site targeted for the integration.
* You have the appropriate TechWolf API licenses.
* You have the appropriate SkillEngine API credentials, which include:
* Tenant ID
* Tenant secret
* Tenant name
* Region (Europe or United States)
* You have a TechWolf API tenant set up that contains the relevant employee
information necessary for the Jira Integration. A custom property called
`jira_id` is added for all employees containing their Jira ID or a custom
property called `email` is added for all employees containing their email.
* You have at least one active project on the specified Jira site.
## Installation
Please read through all the steps carefully, **every step** must be followed and
submitted for the Jira-TechWolf integration to work properly.
1. Navigate to the Jira Marketplace from within your Jira site. On the top
navigation bar, click Apps → Explore more apps.
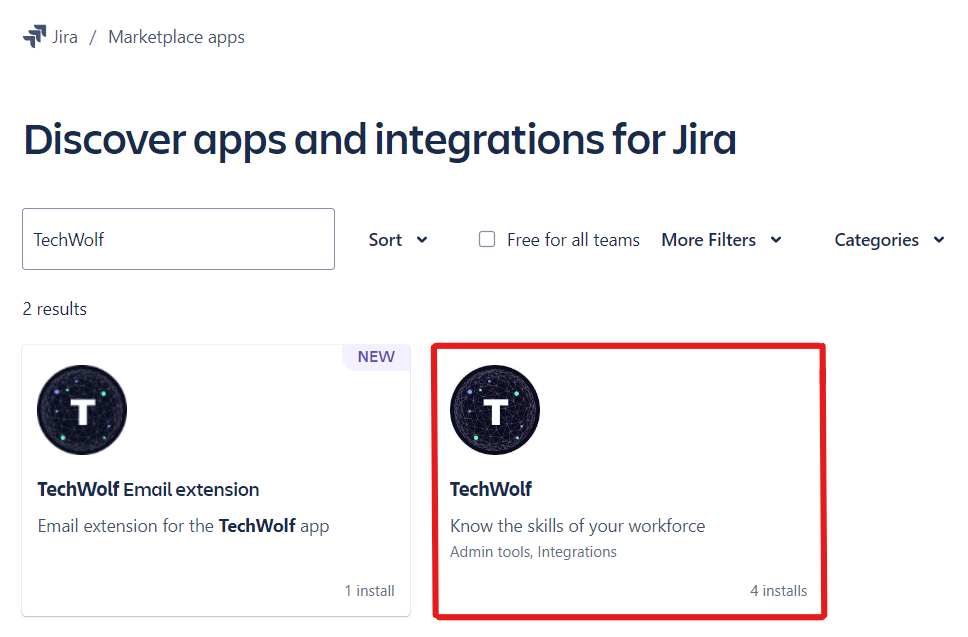
2. In the search box, type "TechWolf" and press enter. You should see the
following results:
 3. Click on `TechWolf`
4. On the app's page, click `Get app` in the upper right corner
5. A window will appear displaying the app's permissions. Click `Get it now` to
install the TechWolf app.
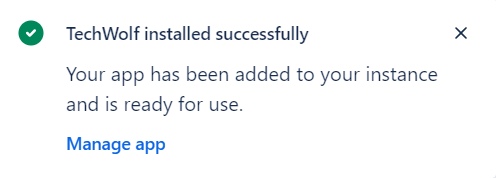
6. A popup will notify you that the app is being installed. After a short
moment, a message will display: "TechWolf installed successfully."
3. Click on `TechWolf`
4. On the app's page, click `Get app` in the upper right corner
5. A window will appear displaying the app's permissions. Click `Get it now` to
install the TechWolf app.
6. A popup will notify you that the app is being installed. After a short
moment, a message will display: "TechWolf installed successfully."
 The TechWolf application has now been installed on your Jira site.
### Finding the configuration page
On the configuration page, you will be able to submit your TechWolf credentials.
1. Go to the Jira site where you installed the Jira-TechWolf app:
`.atlassian.net/jira`.
2. In the upper selection menu of your site, select `Apps`. A dropdown menu will
appear.
The TechWolf application has now been installed on your Jira site.
### Finding the configuration page
On the configuration page, you will be able to submit your TechWolf credentials.
1. Go to the Jira site where you installed the Jira-TechWolf app:
`.atlassian.net/jira`.
2. In the upper selection menu of your site, select `Apps`. A dropdown menu will
appear.
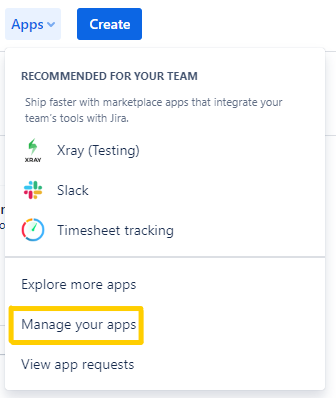
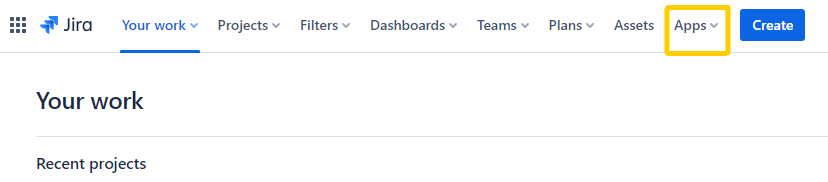 3. Now, in the dropdown menu, click on `Manage your apps`.
 You will be redirected to the apps settings page of your Jira site.
4. In the side bar on the left, click on `TechWolf app settings` under the
`Apps` tab.
You will be redirected to the apps settings page of your Jira site.
4. In the side bar on the left, click on `TechWolf app settings` under the
`Apps` tab.
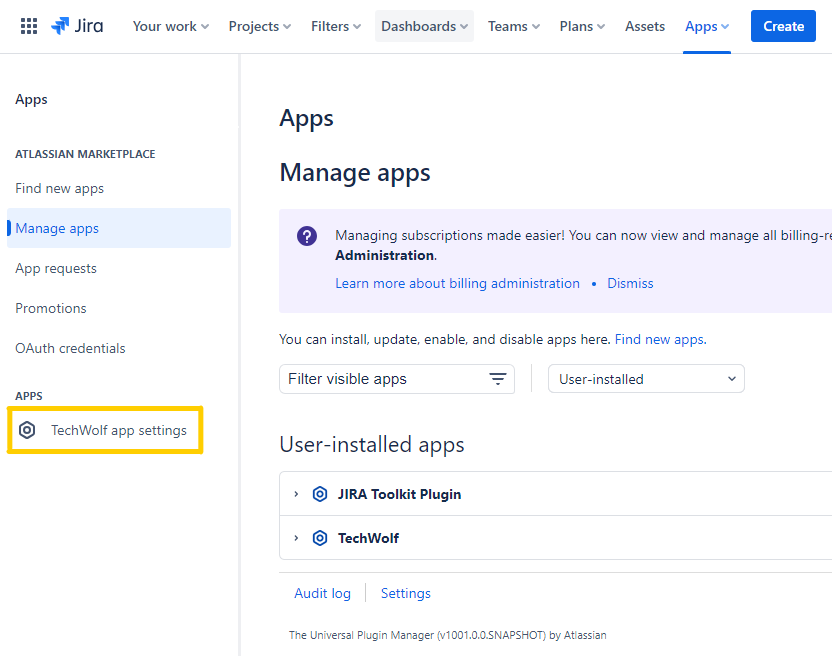 You will be redirected to the settings page of the TechWolf app.
### Configuring the connection to TechWolf via the SkillEngine API
After clicking on the `TechWolf app settings` , you will land on the following
page:
You will be redirected to the settings page of the TechWolf app.
### Configuring the connection to TechWolf via the SkillEngine API
After clicking on the `TechWolf app settings` , you will land on the following
page:
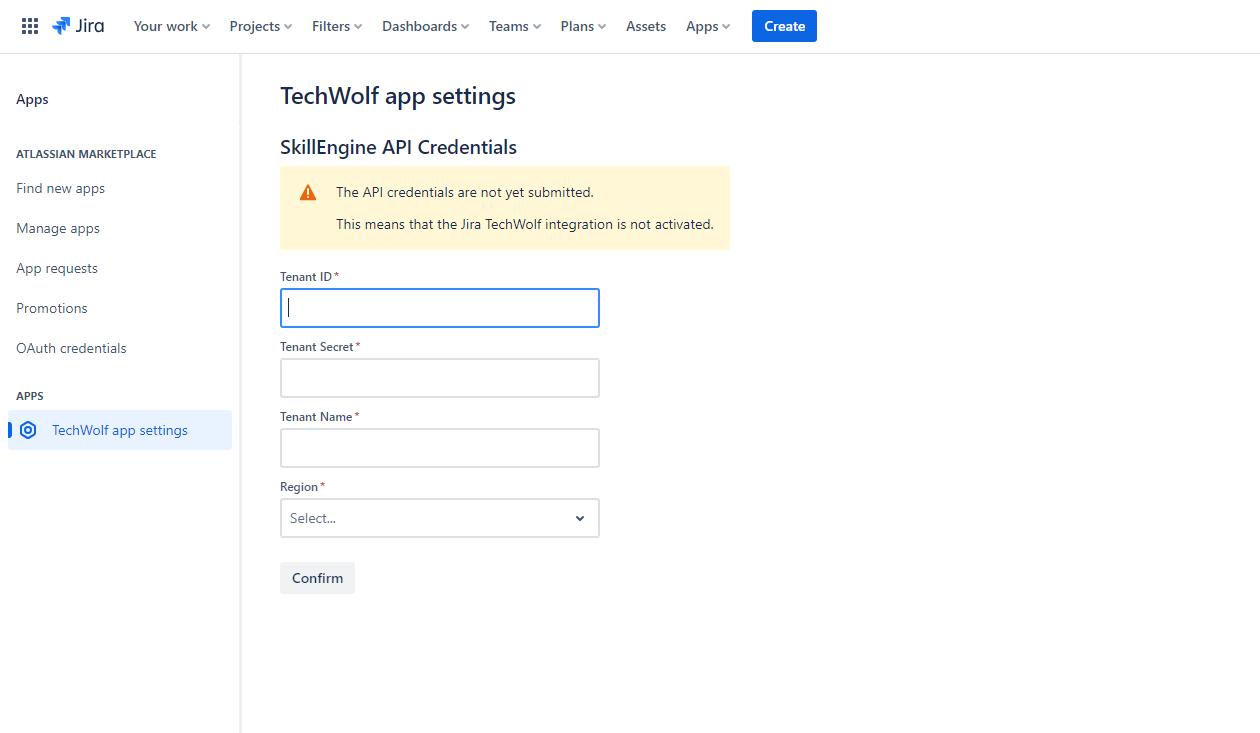 1. Under `SkillEngine API Credentials` , populate the form with your Techwolf
credentials:
*tenant ID, Tenant secret, tenant name, region*
If don’t have access to such credentials, please contact TechWolf support.
1. Under `SkillEngine API Credentials` , populate the form with your Techwolf
credentials:
*tenant ID, Tenant secret, tenant name, region*
If don’t have access to such credentials, please contact TechWolf support.
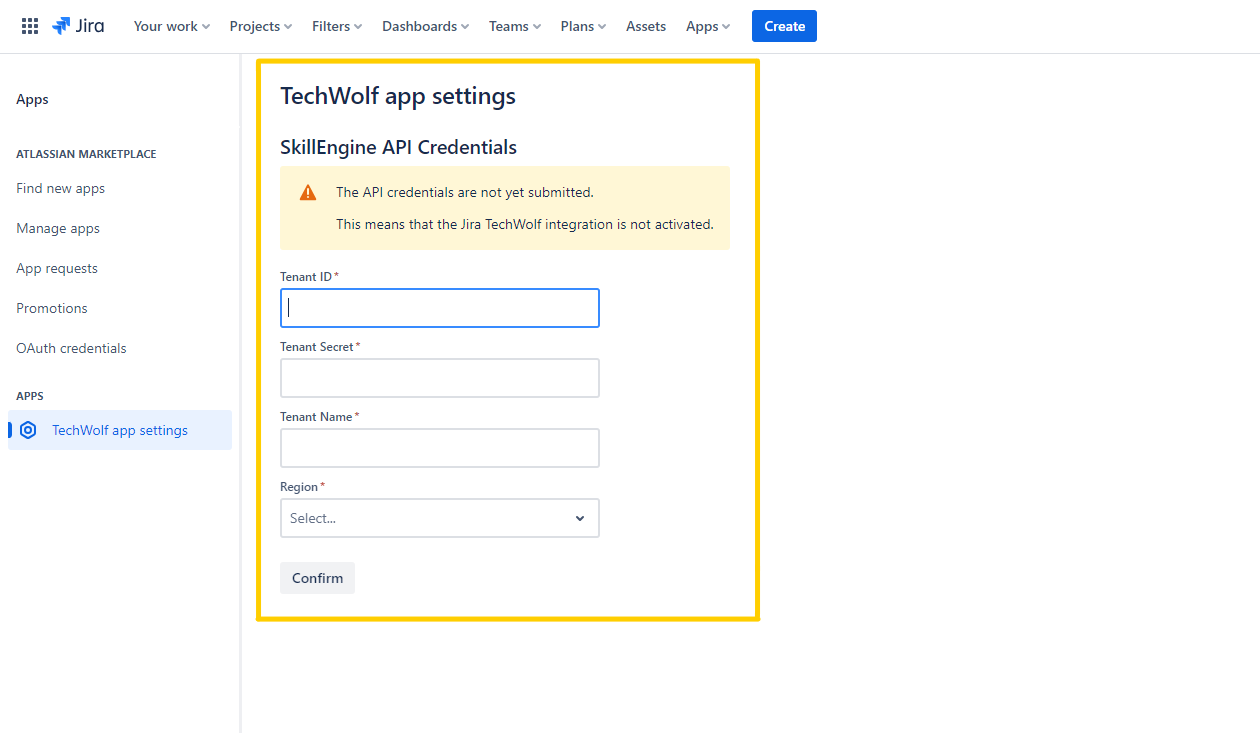 2. Click `Confirm` in order for the credentials to be correctly stored.
If this feedback message is shown:
2. Click `Confirm` in order for the credentials to be correctly stored.
If this feedback message is shown:
 You successfully established a connection with the TechWolf API.
If any other feedback is provided, something went wrong establishing the
connection. Please follow the feedback’s instructions.
3. If you want to use email addresses to map Employees in Jira to the correct
Employee in the TechWolf API, then click on the toggle in the
`Enable Email-Based ID Mapping` section.
Once correctly configured, there is no need to ever do this again except for
when the app is deleted and reinstalled.
Once completed, the Jira TechWolf integration is successfully installed! Enjoy
inferring skills. 🎉
You successfully established a connection with the TechWolf API.
If any other feedback is provided, something went wrong establishing the
connection. Please follow the feedback’s instructions.
3. If you want to use email addresses to map Employees in Jira to the correct
Employee in the TechWolf API, then click on the toggle in the
`Enable Email-Based ID Mapping` section.
Once correctly configured, there is no need to ever do this again except for
when the app is deleted and reinstalled.
Once completed, the Jira TechWolf integration is successfully installed! Enjoy
inferring skills. 🎉